> ## Documentation Index
> Fetch the complete documentation index at: https://qualcomm-3.mintlify.site/llms.txt
> Use this file to discover all available pages before exploring further.
# Configure the Device
> Set a password, connect to Wi-Fi, and complete initial setup after flashing.
## Prerequisites
Flashing must be complete before proceeding. If you haven't flashed yet, see [Flash the Operating System](./flash-os).
***
## Configuration steps
Reboot the device into the newly installed operating system, then click **Configure Login** in Qualcomm® Launcher to begin setup.
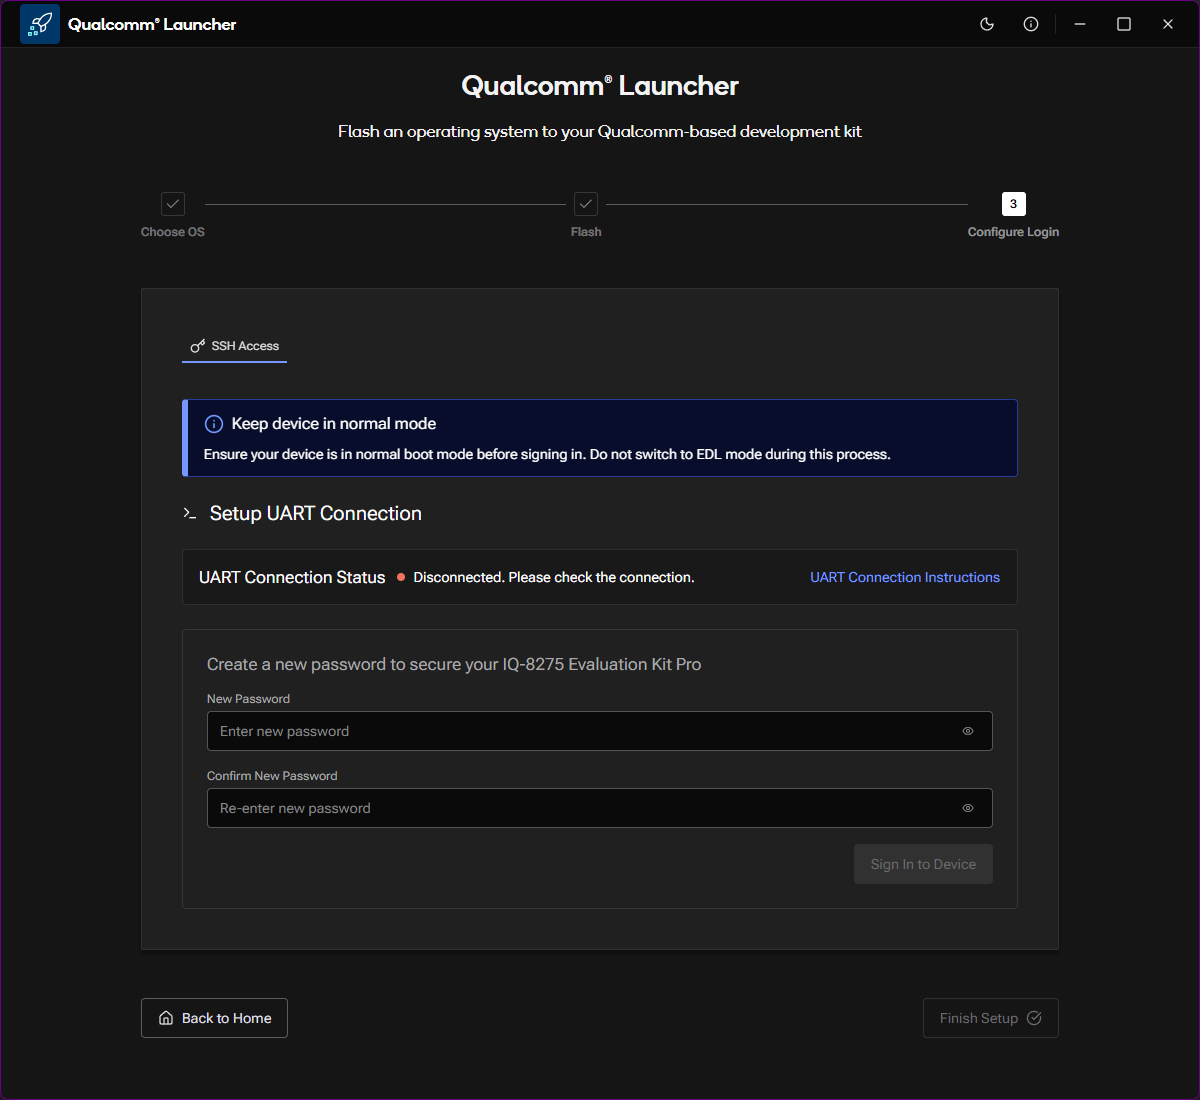 Connect the MicroUSB cable to your device as shown on the screen. This cable
is used for the initial UART-based setup connection.
Once the UART connection is established (status shows **Connected**), create a new password to secure your development kit, then click **Sign In to Device**.
Connect the MicroUSB cable to your device as shown on the screen. This cable
is used for the initial UART-based setup connection.
Once the UART connection is established (status shows **Connected**), create a new password to secure your development kit, then click **Sign In to Device**.
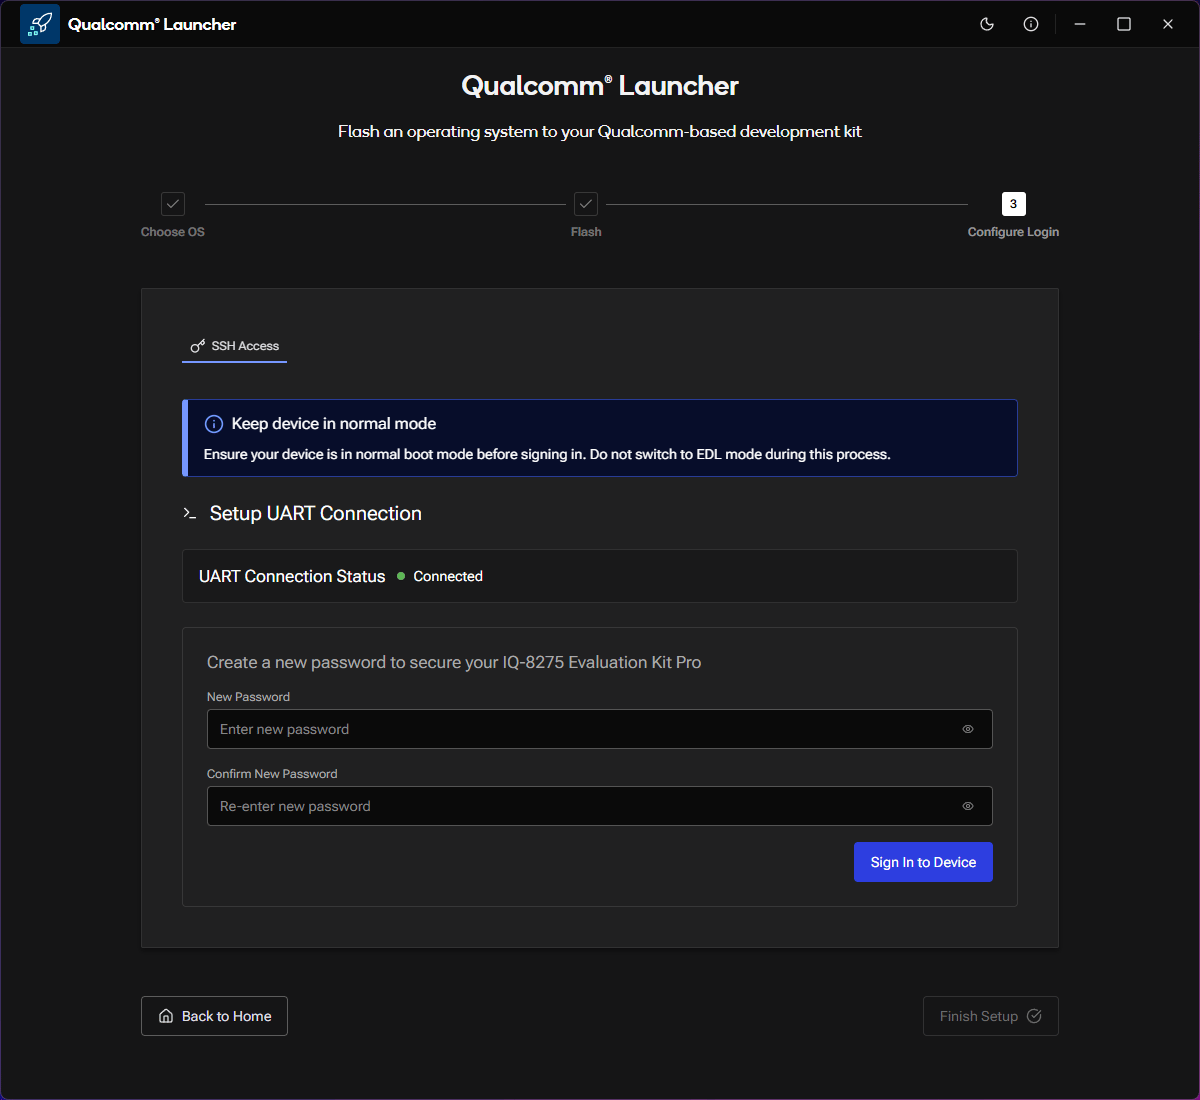 Keep your device in **normal boot mode** during this step. Do not switch to EDL mode while signing in.
Select your Wi-Fi network from the list of available networks and enter the password when prompted, then click **Configure Wi-Fi**.
Keep your device in **normal boot mode** during this step. Do not switch to EDL mode while signing in.
Select your Wi-Fi network from the list of available networks and enter the password when prompted, then click **Configure Wi-Fi**.
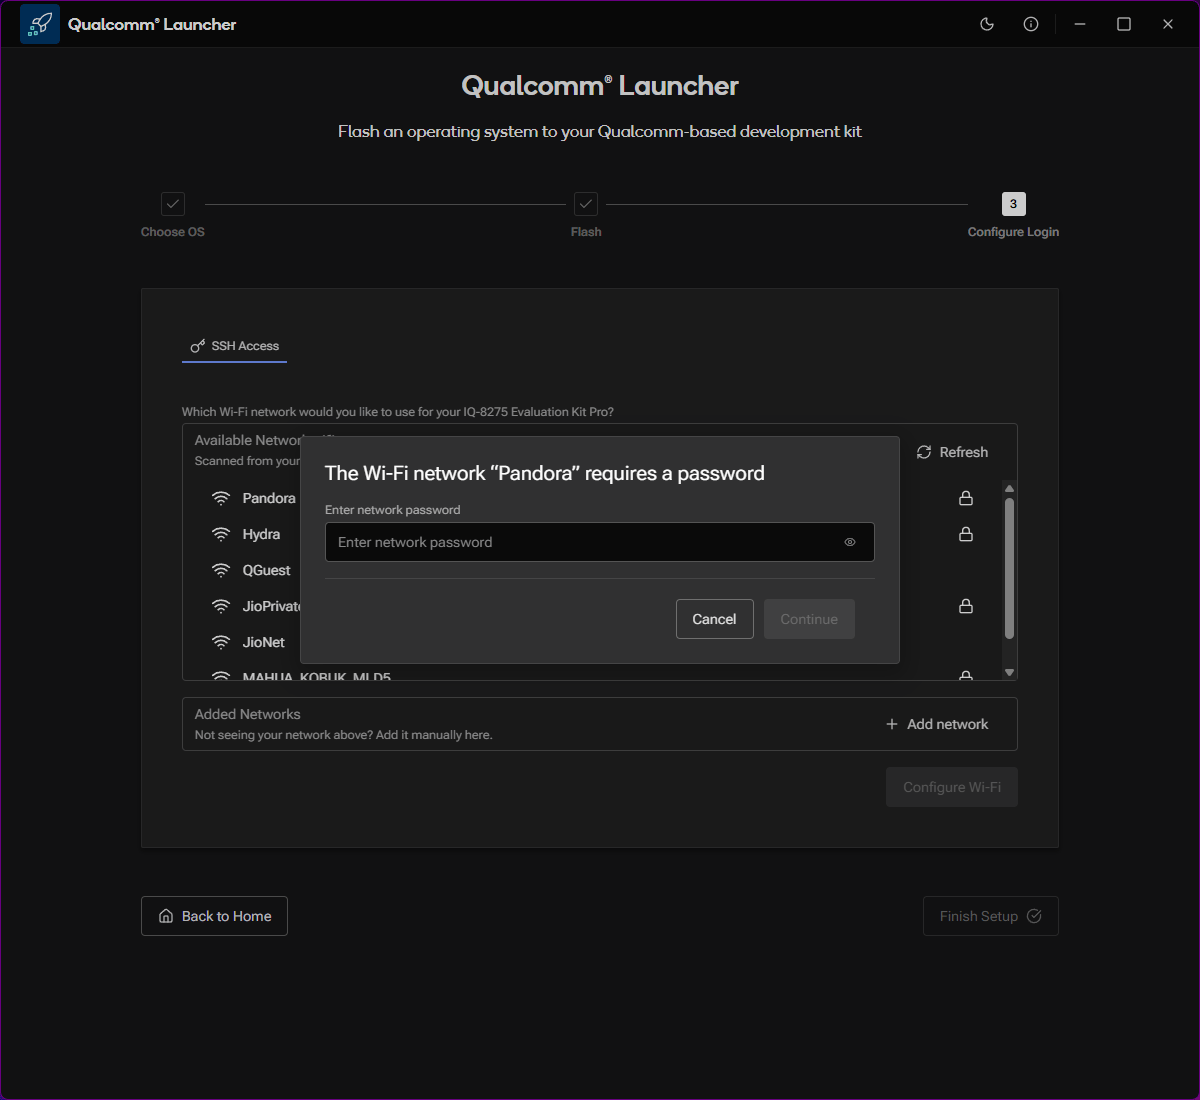 If your network is not listed, click **+ Add network** to add it manually.
Click **Finish Setup** and verify that the **Setup Complete!** confirmation screen appears.
If your network is not listed, click **+ Add network** to add it manually.
Click **Finish Setup** and verify that the **Setup Complete!** confirmation screen appears.
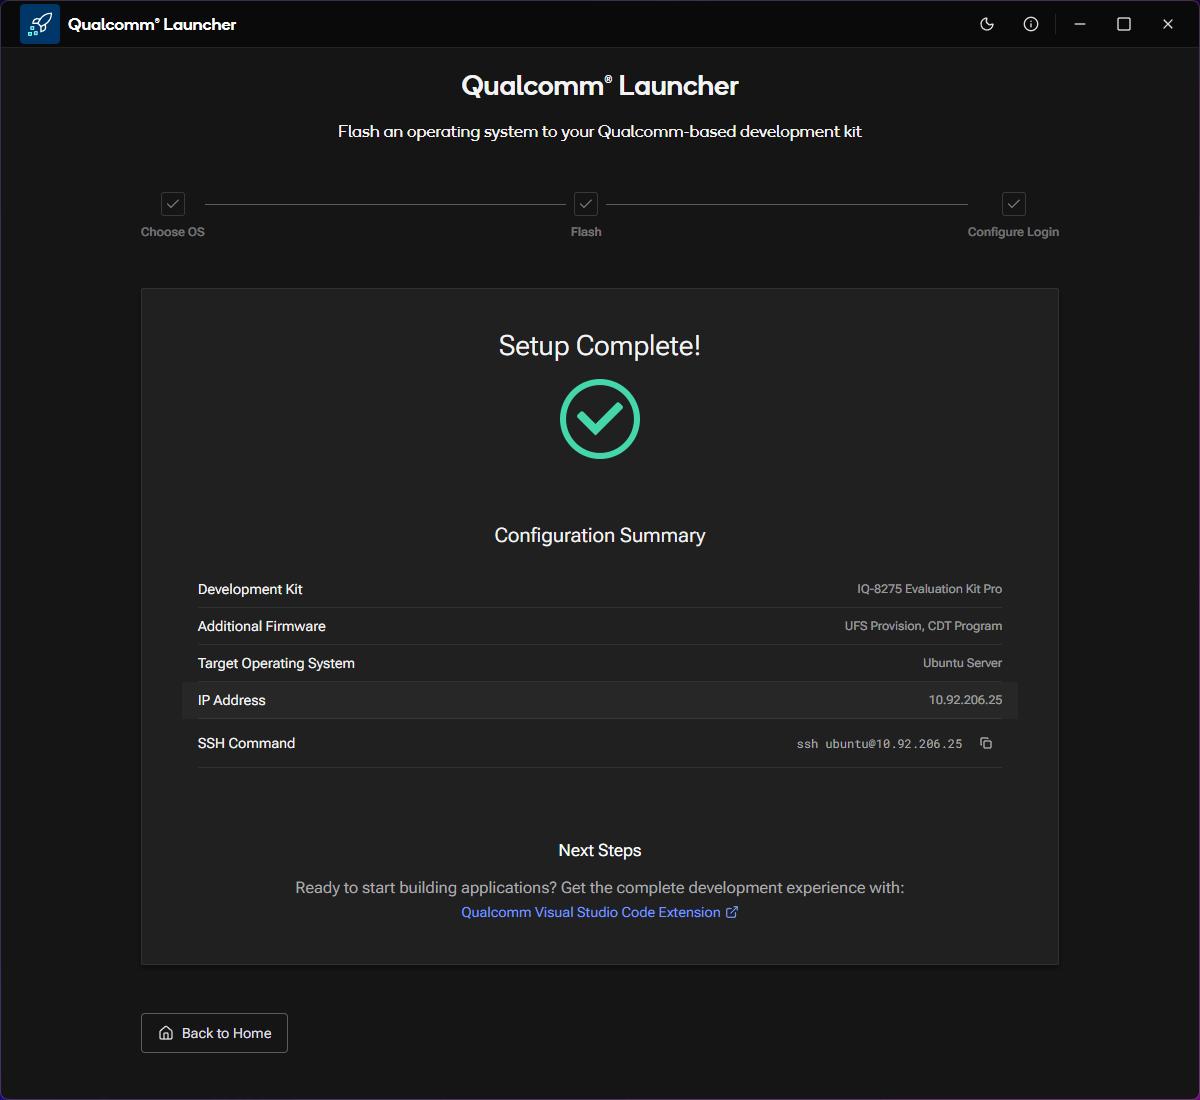 Device configuration is complete.
***
## Configuration summary
After setup, the **Configuration Summary** shows:
| Field | Value |
| ----------------------- | -------------------------- |
| Development Kit | IQ-8275 Evaluation Kit Pro |
| Additional Firmware | UFS Provision, CDT Program |
| Target Operating System | Ubuntu Server |
| IP Address | Assigned by your network |
| SSH Command | `ssh ubuntu@` |
***
## Next steps
Use the SSH command from the Configuration Summary to access your device
remotely.
Get the full development experience with the **Qualcomm Visual Studio Code
Extension**.
Reflash the device with a different operating system image.
Device configuration is complete.
***
## Configuration summary
After setup, the **Configuration Summary** shows:
| Field | Value |
| ----------------------- | -------------------------- |
| Development Kit | IQ-8275 Evaluation Kit Pro |
| Additional Firmware | UFS Provision, CDT Program |
| Target Operating System | Ubuntu Server |
| IP Address | Assigned by your network |
| SSH Command | `ssh ubuntu@` |
***
## Next steps
Use the SSH command from the Configuration Summary to access your device
remotely.
Get the full development experience with the **Qualcomm Visual Studio Code
Extension**.
Reflash the device with a different operating system image.