

If you have not flashed the device yet, start with Update software.
Set up the debug UART
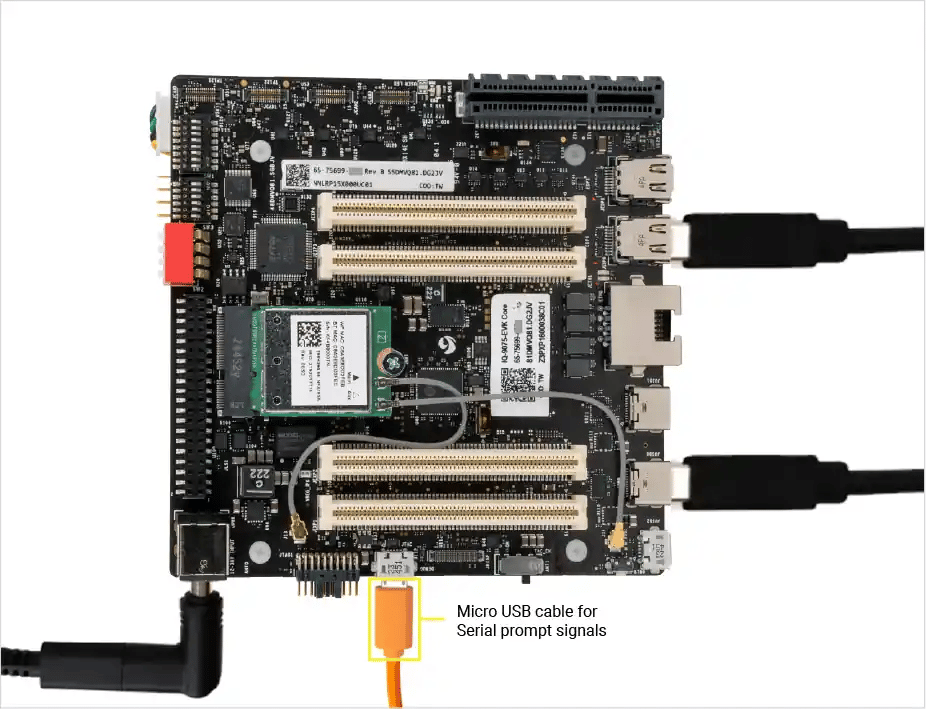
The debug UART gives you a serial console into the device, your primary way to log in and check the device after flashing.- Connect one end of a micro-USB cable to the micro-USB port on the IQ-9075 EVK.
- Connect the other end to your host computer.
- Open the serial console for your host OS:
- Ubuntu
- Windows
- macOS
Install List the serial devices:Sample output:The IQ-9075 EVK’s onboard adapter exposes four serial devices; the main console is the second one (
screen:/dev/ttyUSB1). Open it at 115200 baud: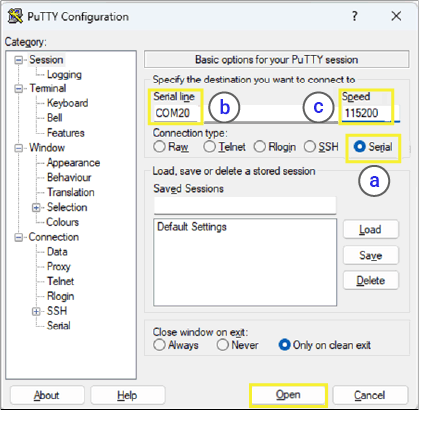
- Press Enter to bring up the login prompt, then sign in:
- Username:
root - Password:
oelinux123
- Username:
Verify the software version
Confirm the device is running Qualcomm Linux:If the version doesn’t match, or you can’t reach a login prompt at all, the image is missing or outdated. Go back to Update software and flash the latest Qualcomm Linux.
Connect to the device
Choose one of the options below. All three require the UART console for the initial setup commands (see Set up the debug UART). After the first setup, USB (ADB) gives you a direct USB shell; Wi-Fi and Ethernet let you connect over SSH.- USB (ADB)
- Wi-Fi
- Ethernet
ADB (Android Debug Bridge) gives you a USB shell into the device. Because Verify:2. Enable adbd on the device (one-time, from the UART console):3. Connect and open a shell:Connect a USB Type-C cable from your host to the device.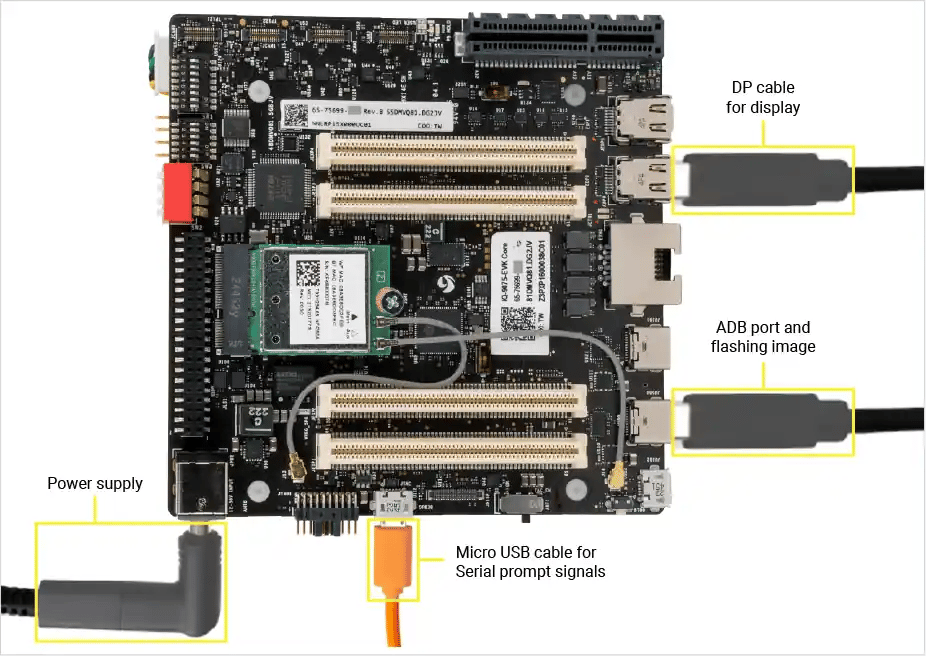
adbd is disabled by default, you need to enable it once via UART before ADB will work.1. Install ADB on your Ubuntu host:For Windows and Mac hosts install ADB from Android SDK platform tools
Connect a display
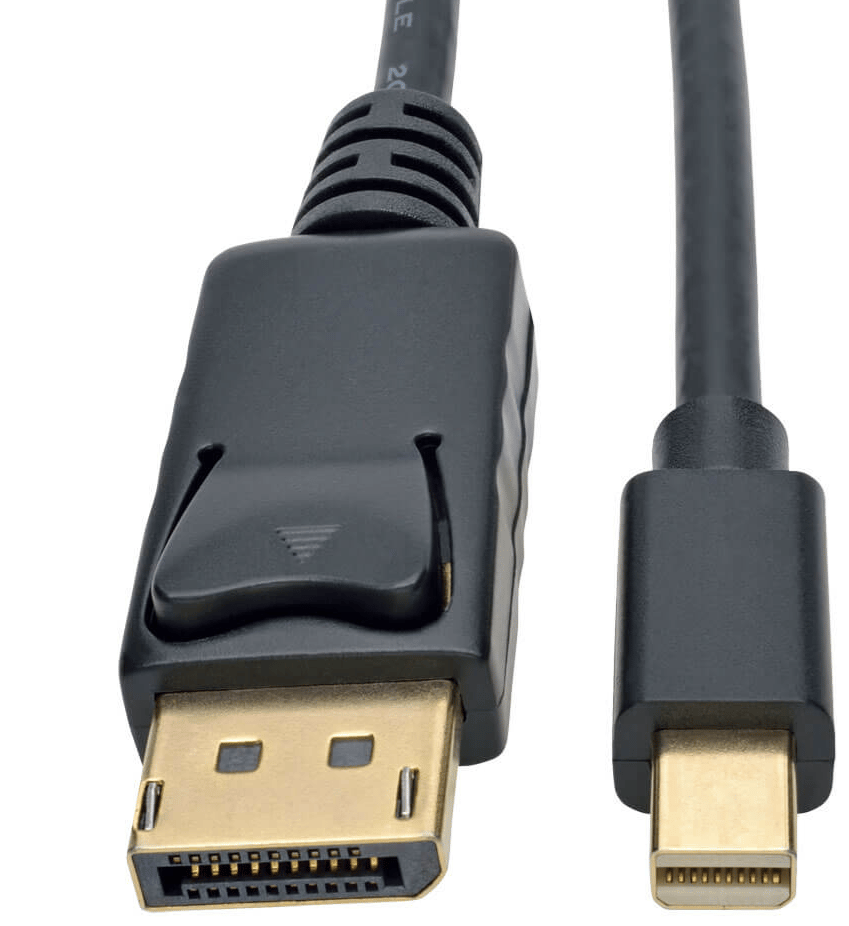
Connect a monitor to DisplayPort0 (JEDP0) or JEDP1 on the EVK using an active Mini DisplayPort-to-DisplayPort cable (included in the box), or an active Mini DisplayPort-to-HDMI adapter (not included).Display output works only through the DisplayPort connectors. There is no display output through the USB Type-C ports.
Connect Bluetooth peripherals
Usebluetoothctl to pair and connect a Bluetooth keyboard or mouse.
-
Open the Bluetooth manager:
-
Power on and start scanning:
-
Wait for your device to appear and note its MAC address:
-
Pair, trust, and connect:
-
Stop scanning and exit:
SBC (Single Board Computer) mode
To use the EVK as a standalone computer with a keyboard, mouse, and monitor: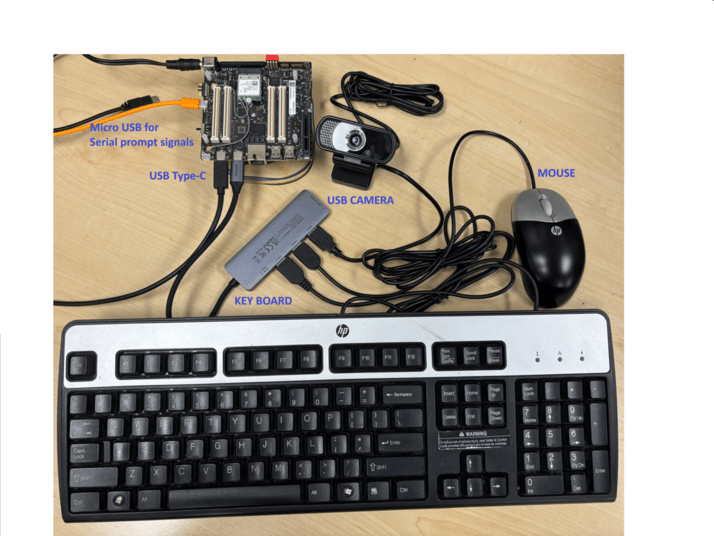
- Power: connect the 12 V adapter.
- Serial console: micro-USB to your host for UART logs (optional once set up).
- USB hub: connect a powered USB hub to a USB Type-C port for multiple peripherals.
- Keyboard & mouse: plug into the USB hub.
- USB camera: connect to the USB hub (must be UVC-compliant).
- MIPI camera: attach to a MIPI CSI connector on the board.
- Display: Mini DisplayPort to DisplayPort cable, or an active Mini DisplayPort-to-HDMI adapter.