

What you need
- IQ-8275 EVK with 12 V power supply
- USB Type-C cable (USB0 port on the EVK → host computer)
- Micro-USB cable (for the UART setup step after flashing)
- Host computer running Windows, Linux, or macOS
Step 1: Install Qualcomm Launcher
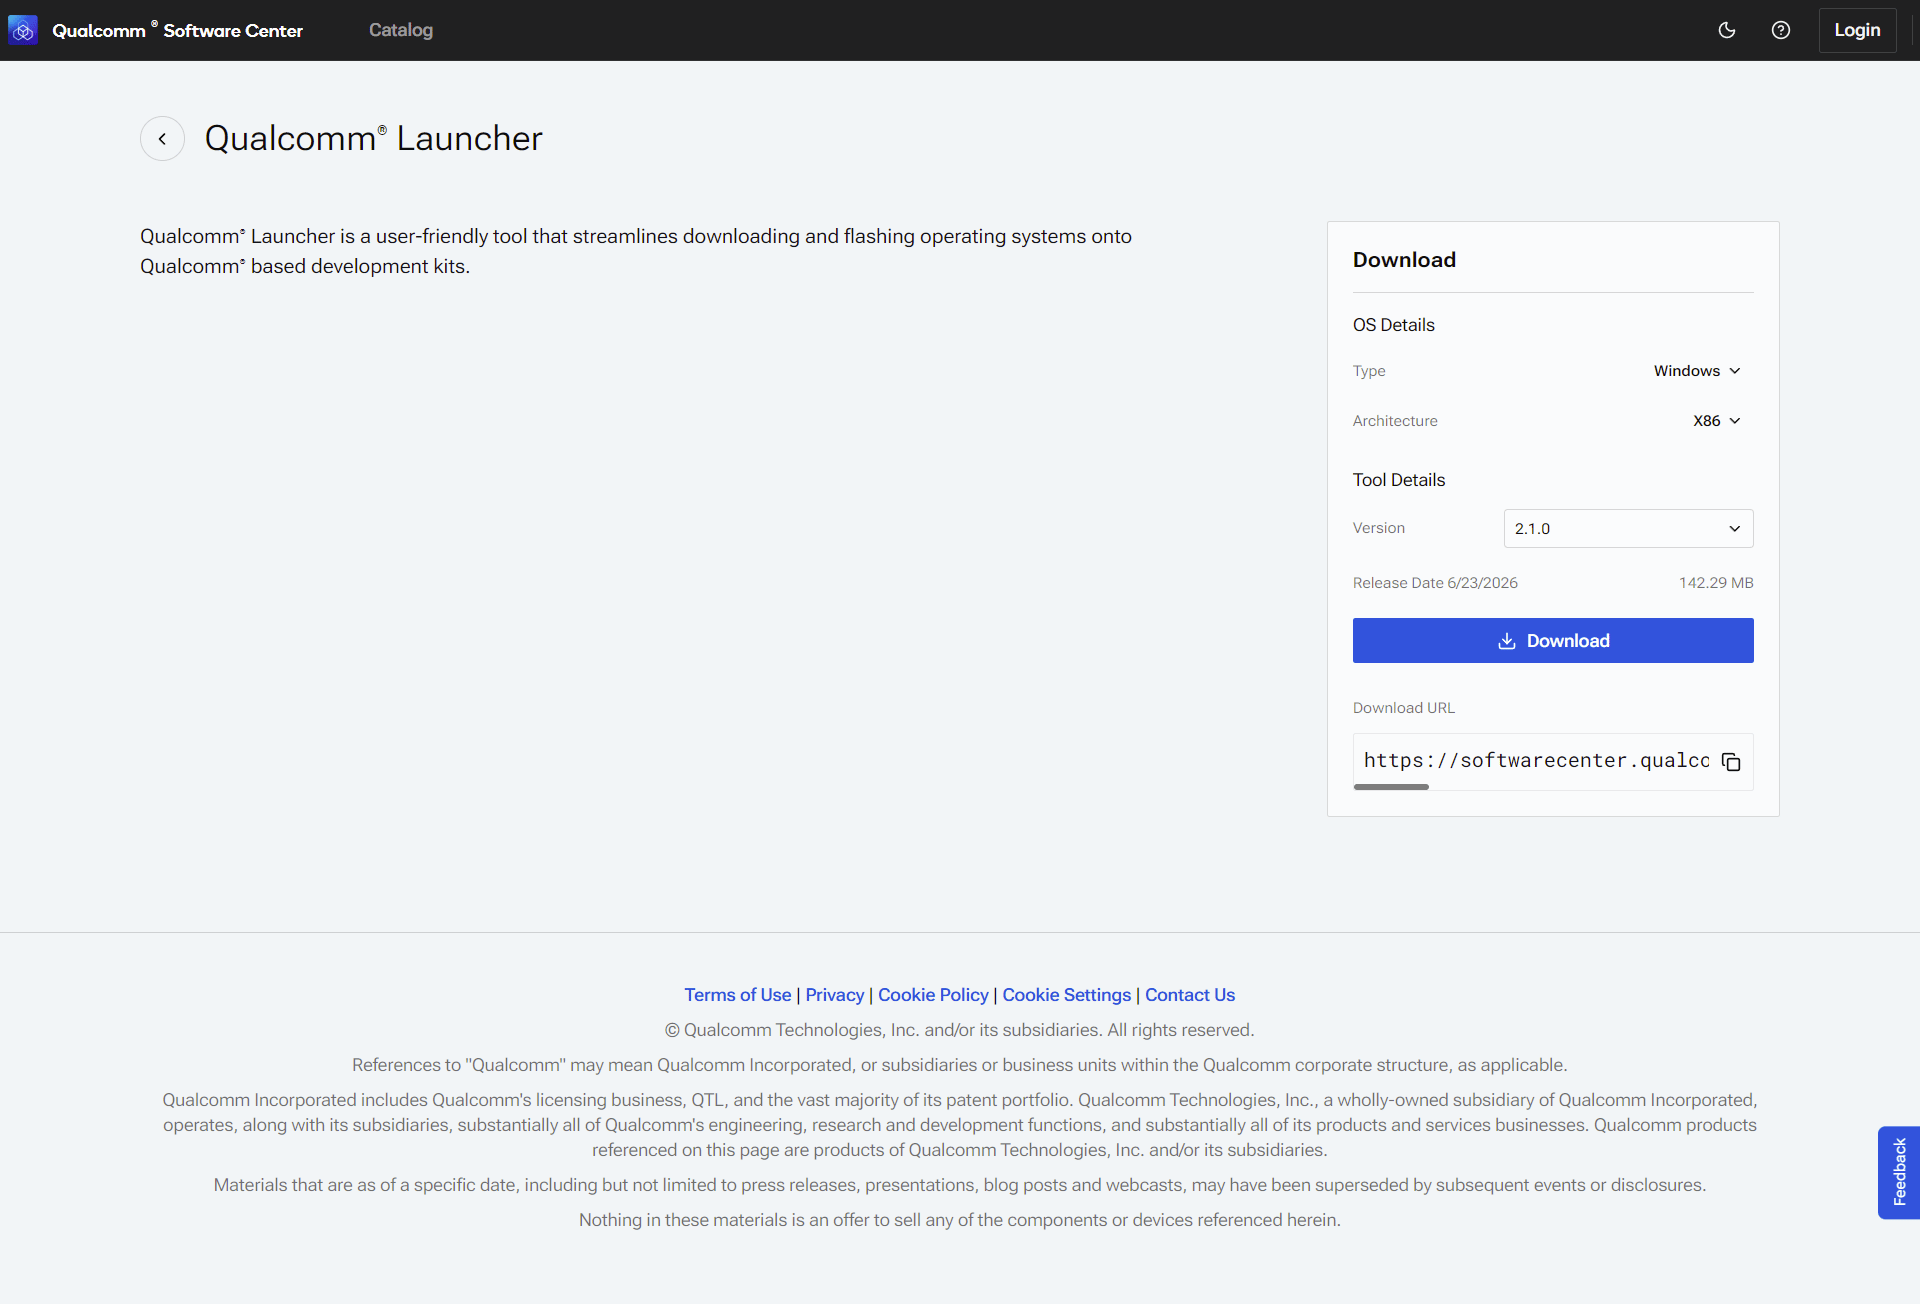
- Go to the Qualcomm Software Center: https://softwarecenter.qualcomm.com/catalog/item/Qualcomm_Launcher
- Download the latest version and run the installer.
Ubuntu host: device not detected? Set up udev rules first
Ubuntu host: device not detected? Set up udev rules first
On Ubuntu, the kernel needs a udev rule to grant permission to communicate with the device when it enters EDL mode. Without this rule, the Launcher will not detect the device even when it is connected and powered on.1. Check whether the rule already exists:2. If the file is not present, create it in one command:If the file already exists, verify the rule is present:3. Reload udev:If the USB cable was already connected, disconnect and reconnect it.You only need to do this once. After that, the Launcher will detect the device automatically.
Windows host: Uninstall existing QUD driver
Windows host: Uninstall existing QUD driver
Before installing Qualcomm Launcher ensure you uninstall any existing Qualcomm USB drivers (QUD) — they conflict with the QDL driver.
Open Device Manager, find your device, and uninstall QUD if already installed. The device should not appear under COM Ports.
Without this rule, the flashing operation through Qualcomm Launcher will fail.
Step 2: Select your development kit
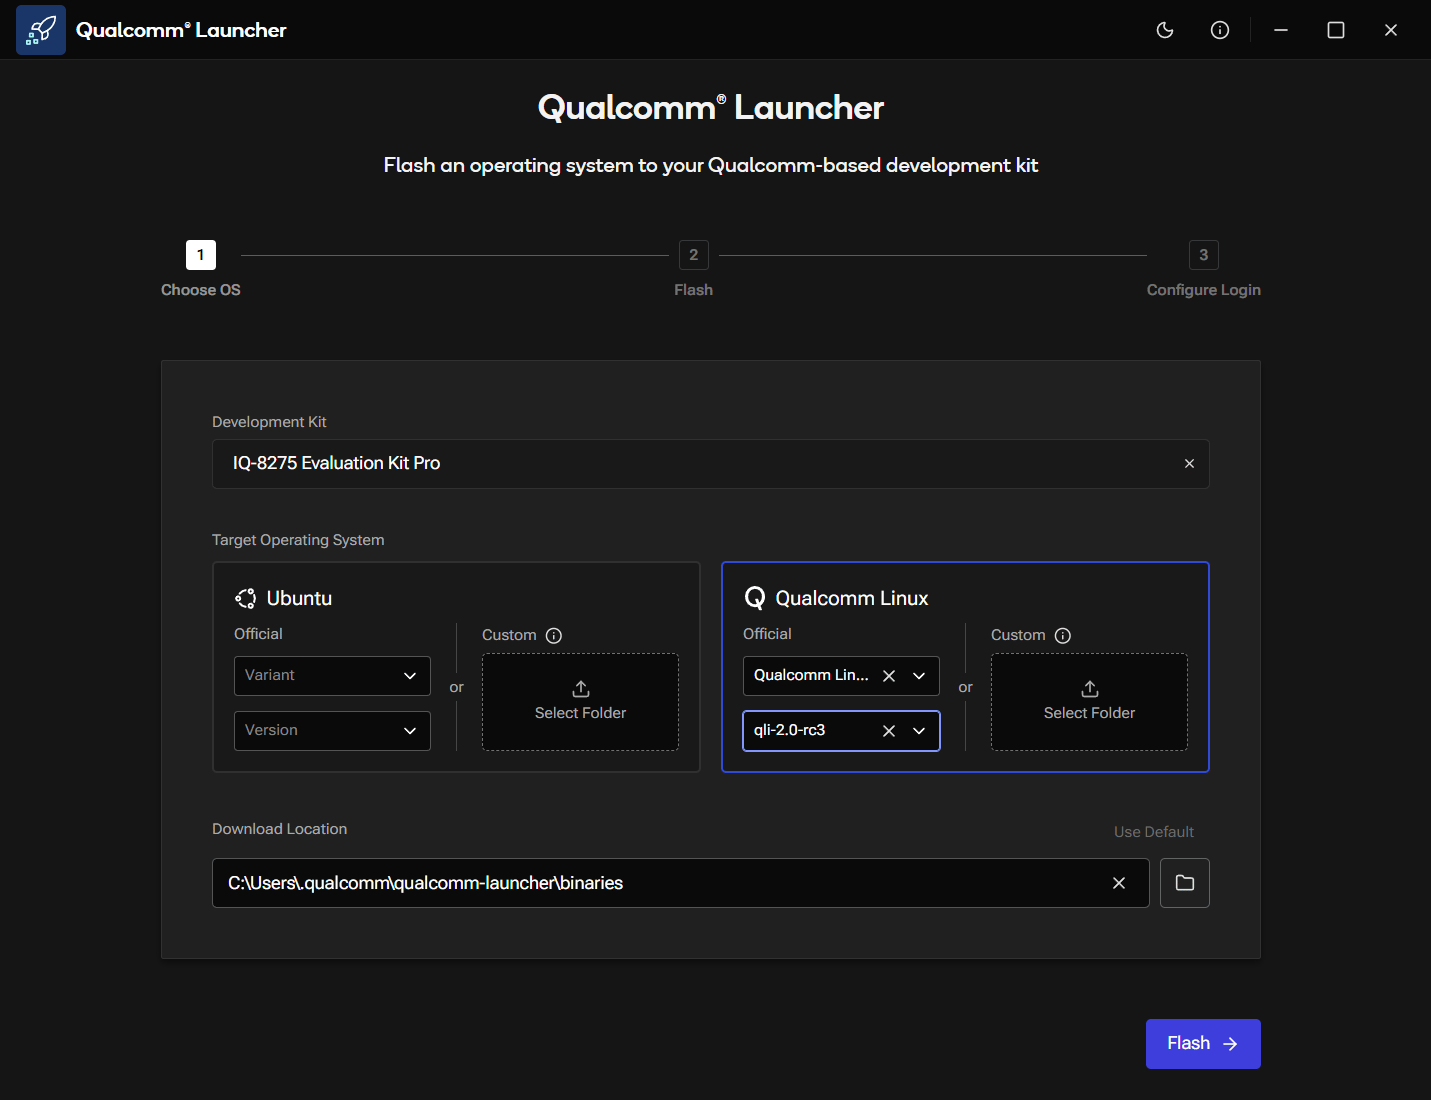
On the Choose OS screen, click Select Development Kit and choose IQ-8275 Evaluation Kit from the list.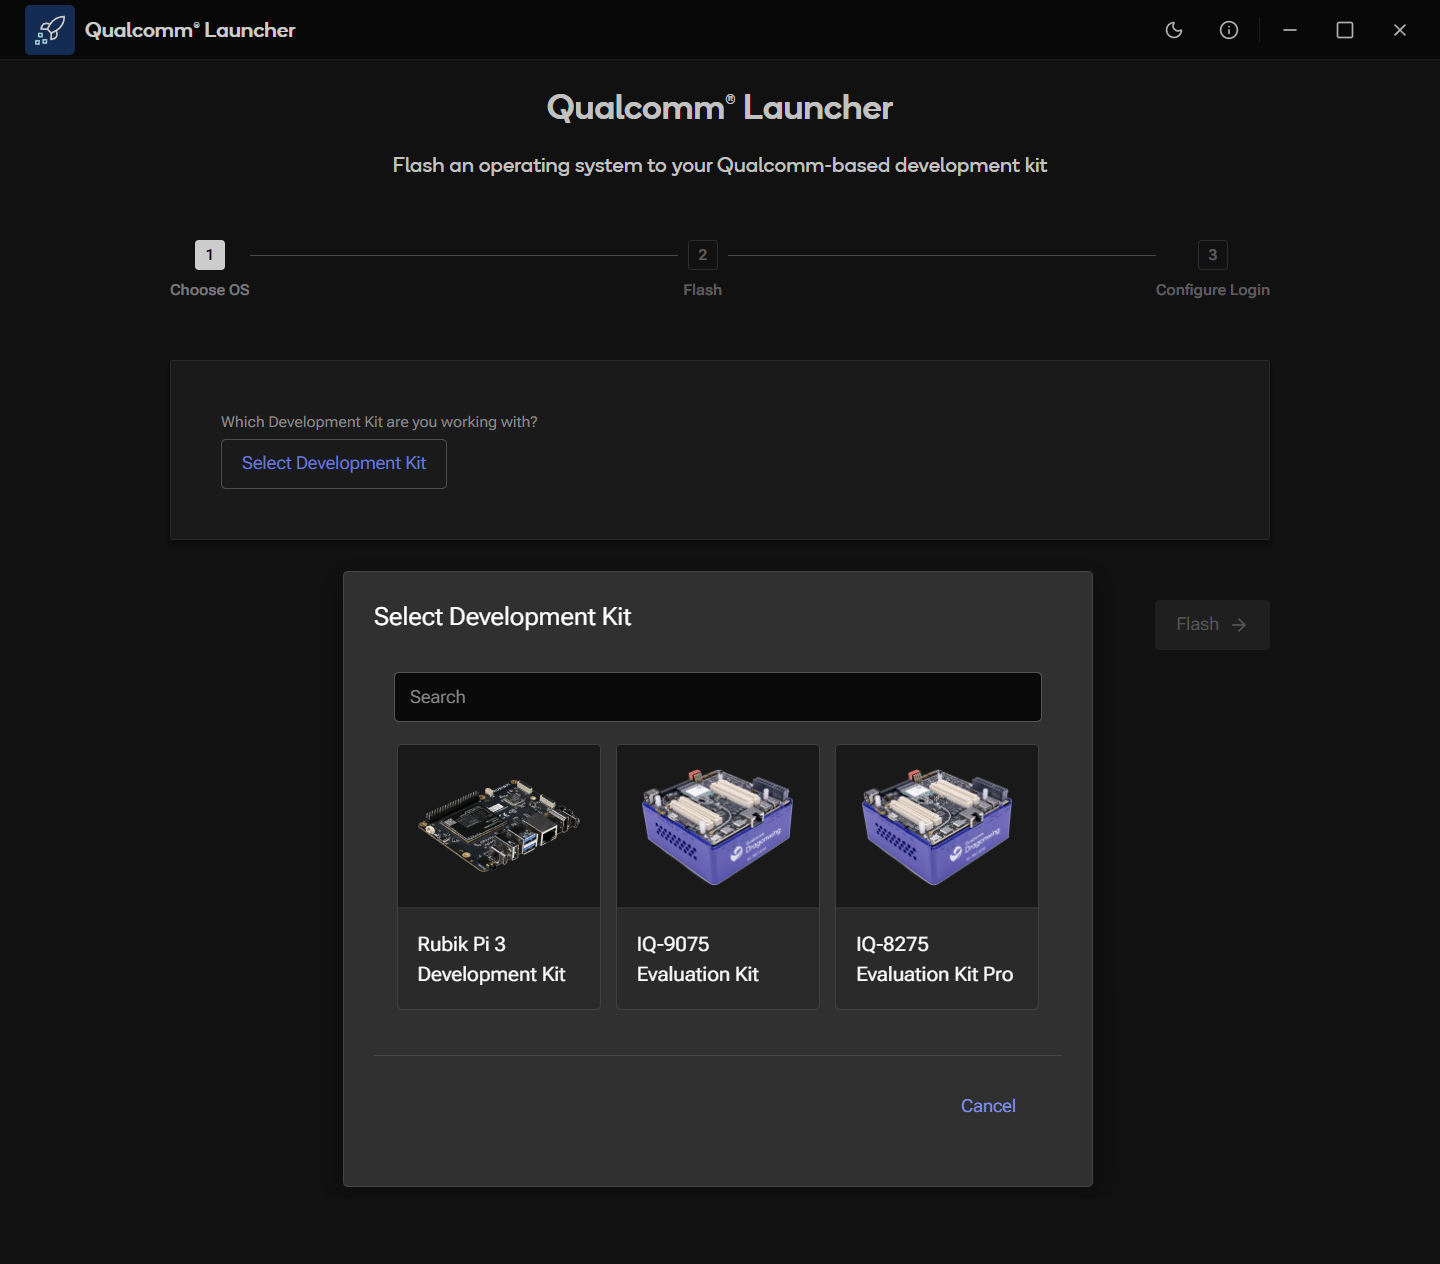
Step 3: Choose the OS image
With the kit selected, the Choose OS screen shows the operating system options.- Under Target Operating System, select the Qualcomm Linux card.
- Choose how to load the build:
- Official release
- Custom (locally built) image
Use the Variant dropdown to select the image type (Qualcomm Linux Proprietary or Qualcomm Linux Open Source), then use the Version dropdown to select the version.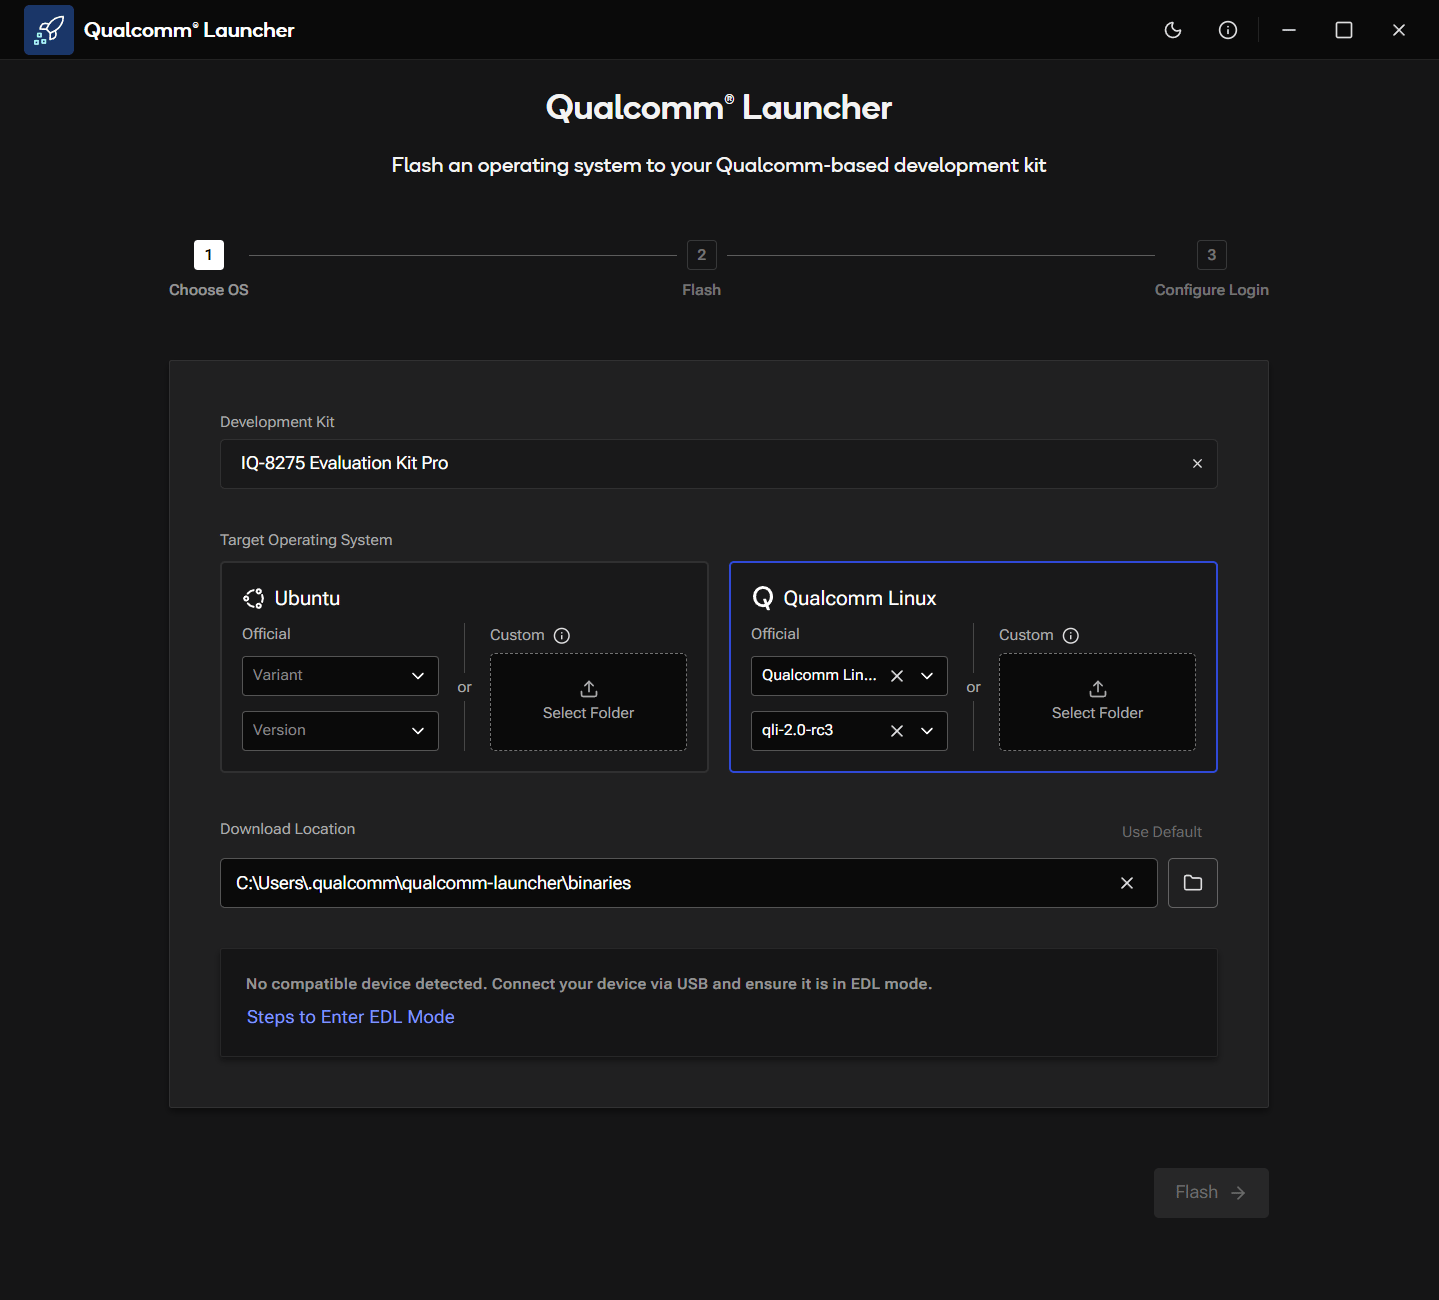
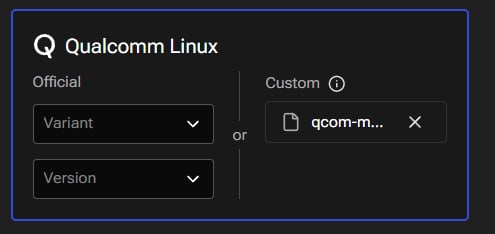
- Leave the Download Location at the default, or choose a custom folder with enough space.
Step 4: Put the device in EDL mode
Emergency Download (EDL) mode tells the device to accept a new firmware image over USB. Until the device is detected, the Choose OS screen shows No compatible device detected and the Flash button stays disabled.-
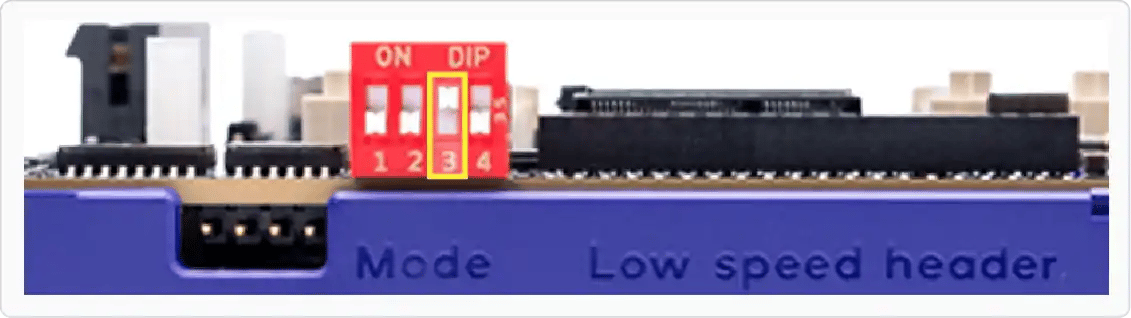
Turn on the SW2-3 DIP switch by pushing it up.
- Connect the 12 V power supply to the EVK.
-
Connect the USB Type-C cable from USB0 on the EVK to your host computer.
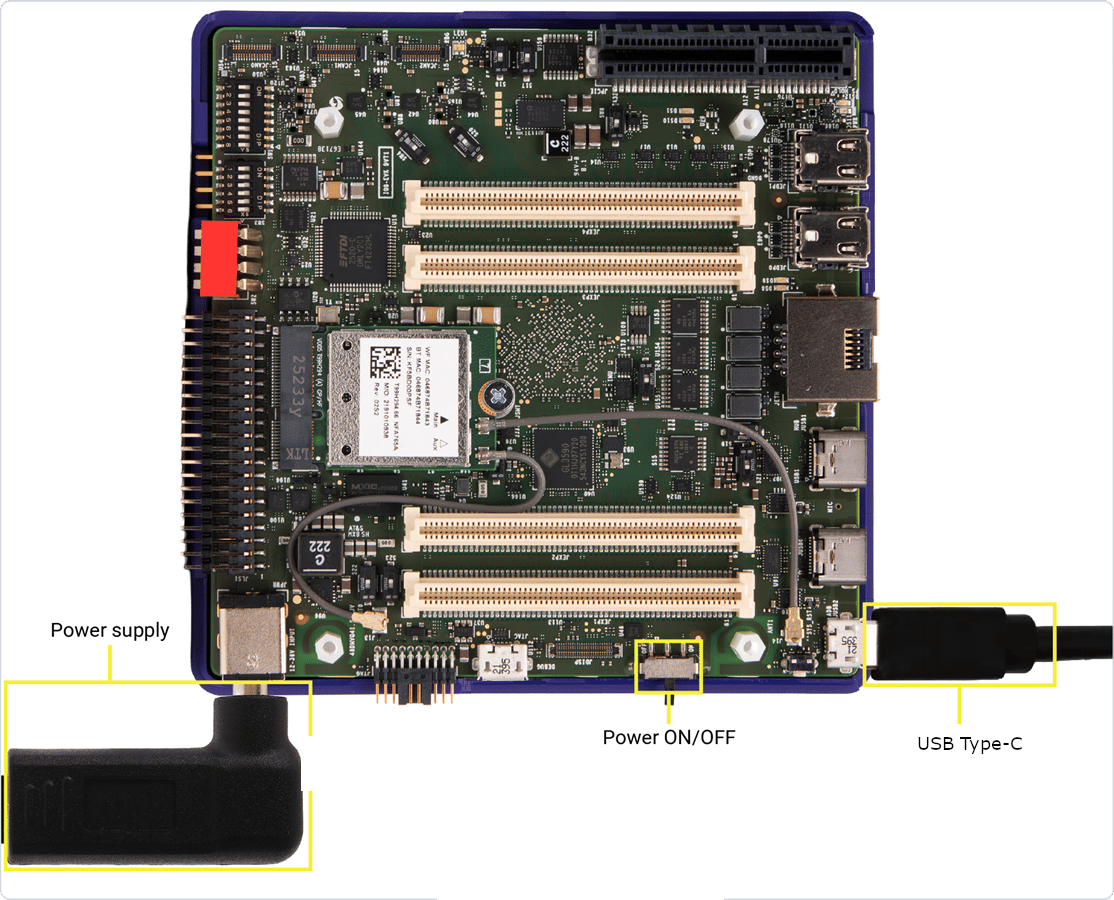
- Toggle the power switch to turn on the device.
Step 5: Flash
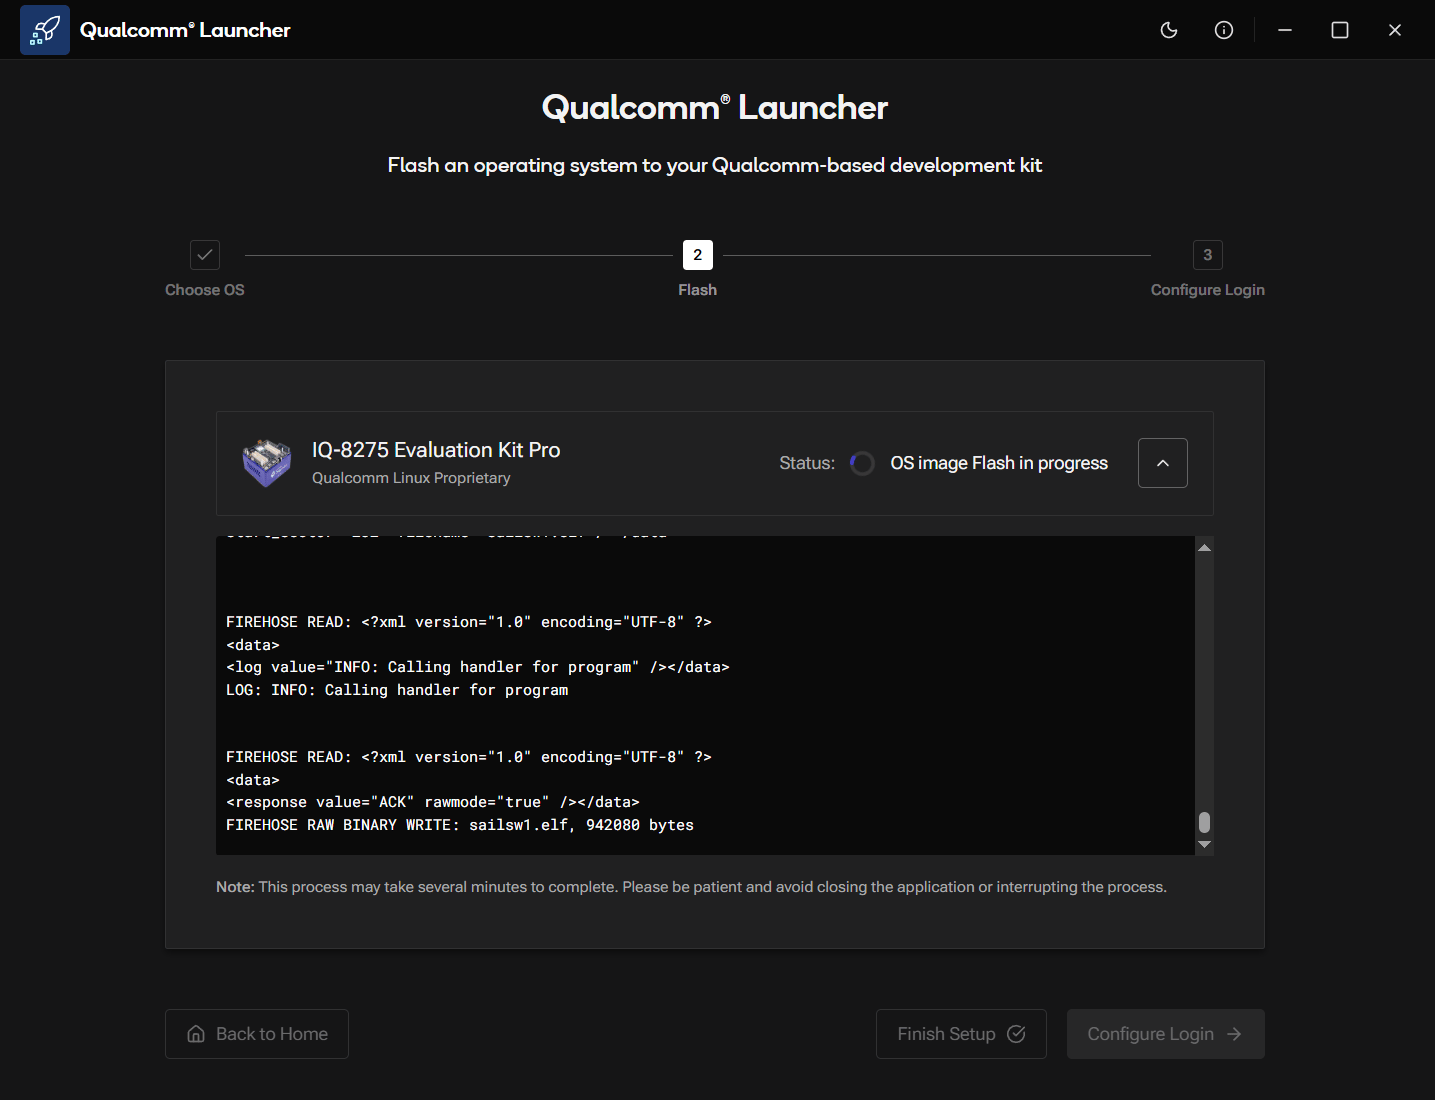
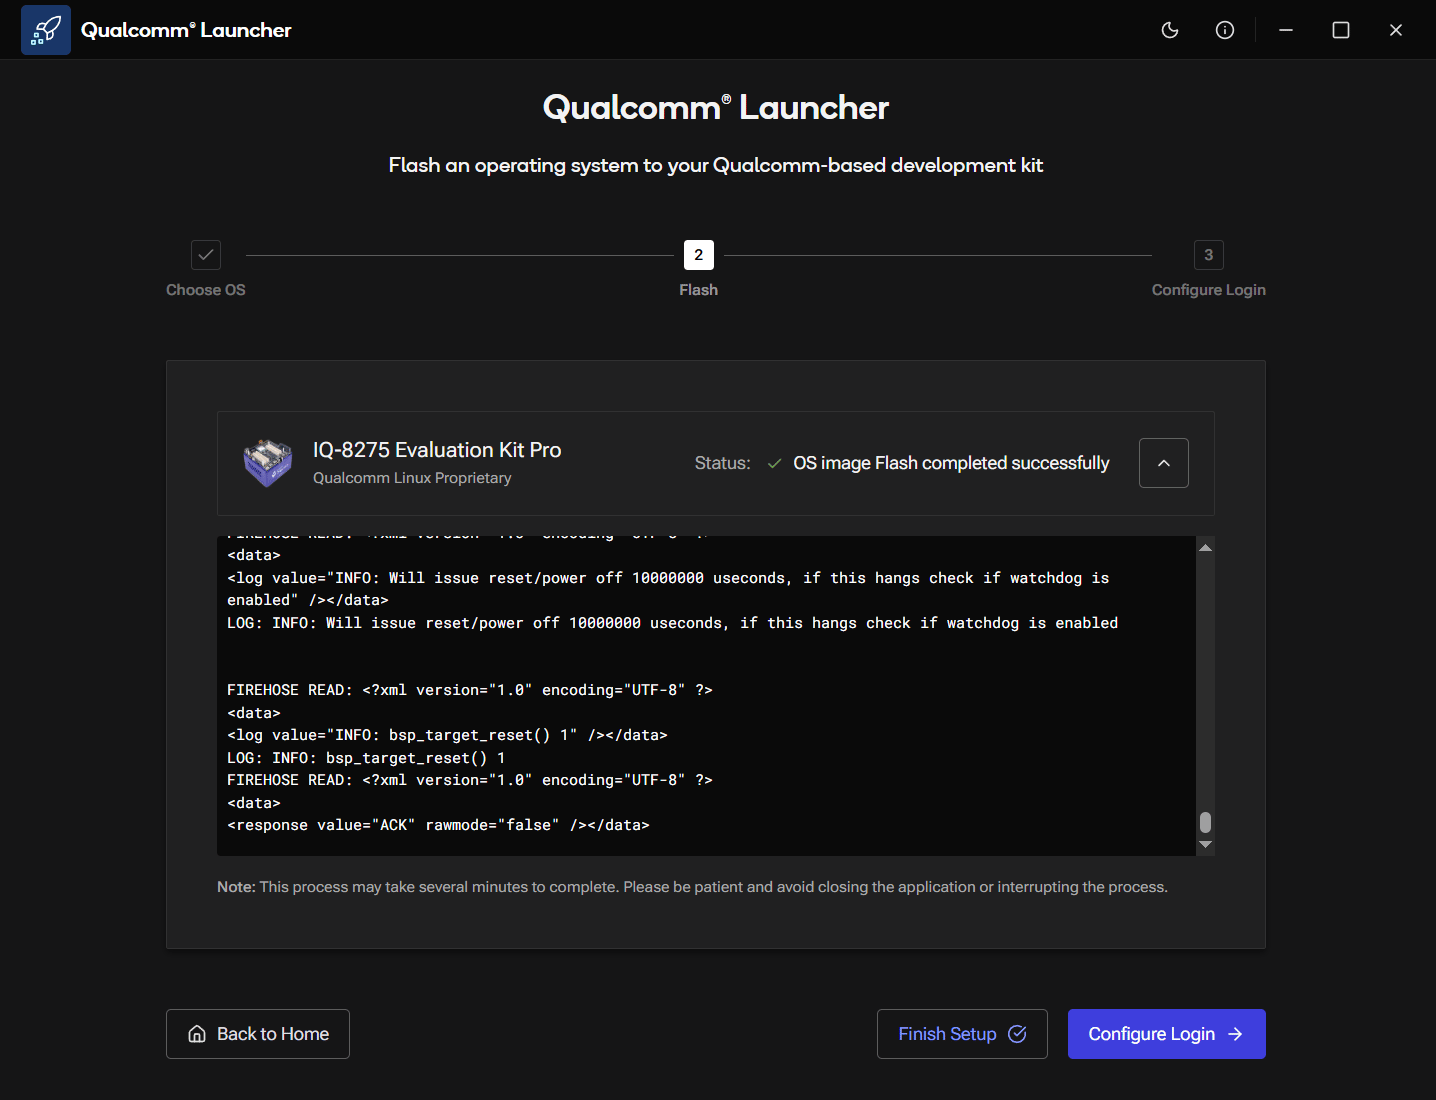
Click the Flash button. The Launcher first downloads the OS image, then flashes the device in two phases. Phase 1: Additional firmware. The Launcher provisions UFS storage and writes the CDT, then advances to the OS image. When this phase finishes, it pauses and asks you to put the device back into EDL mode: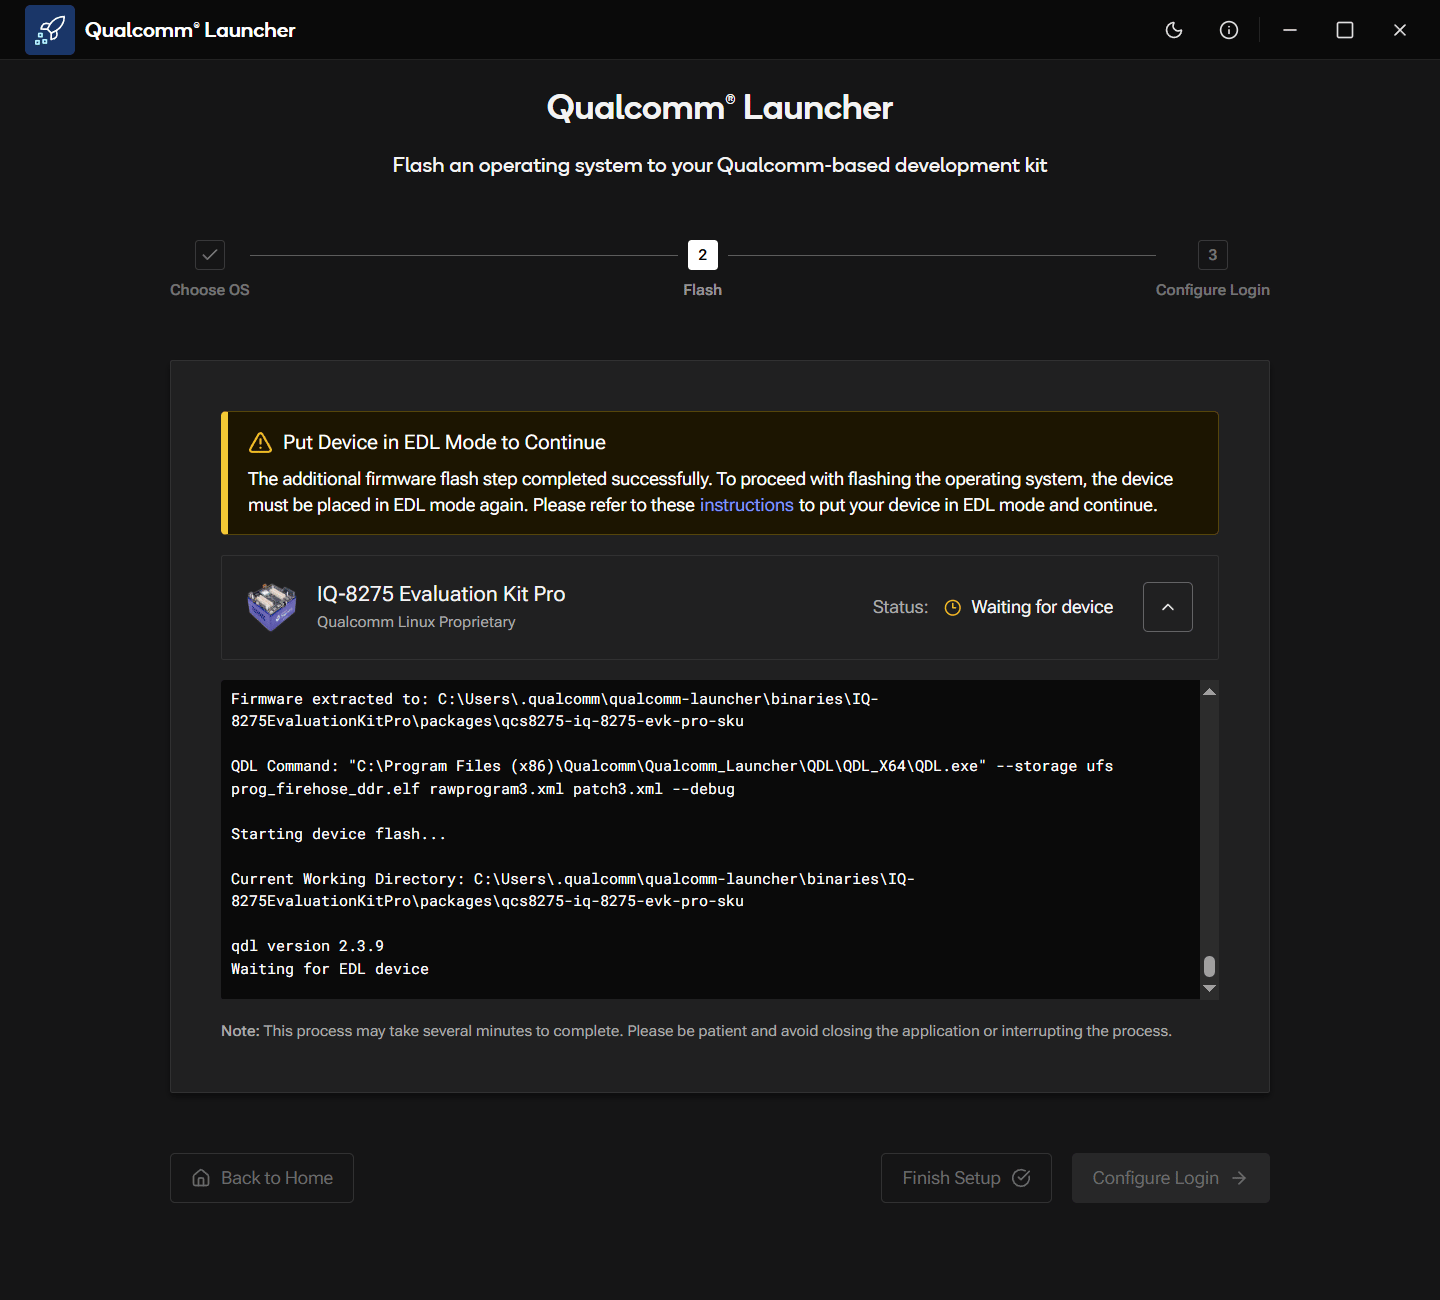
Step 6: Configure login
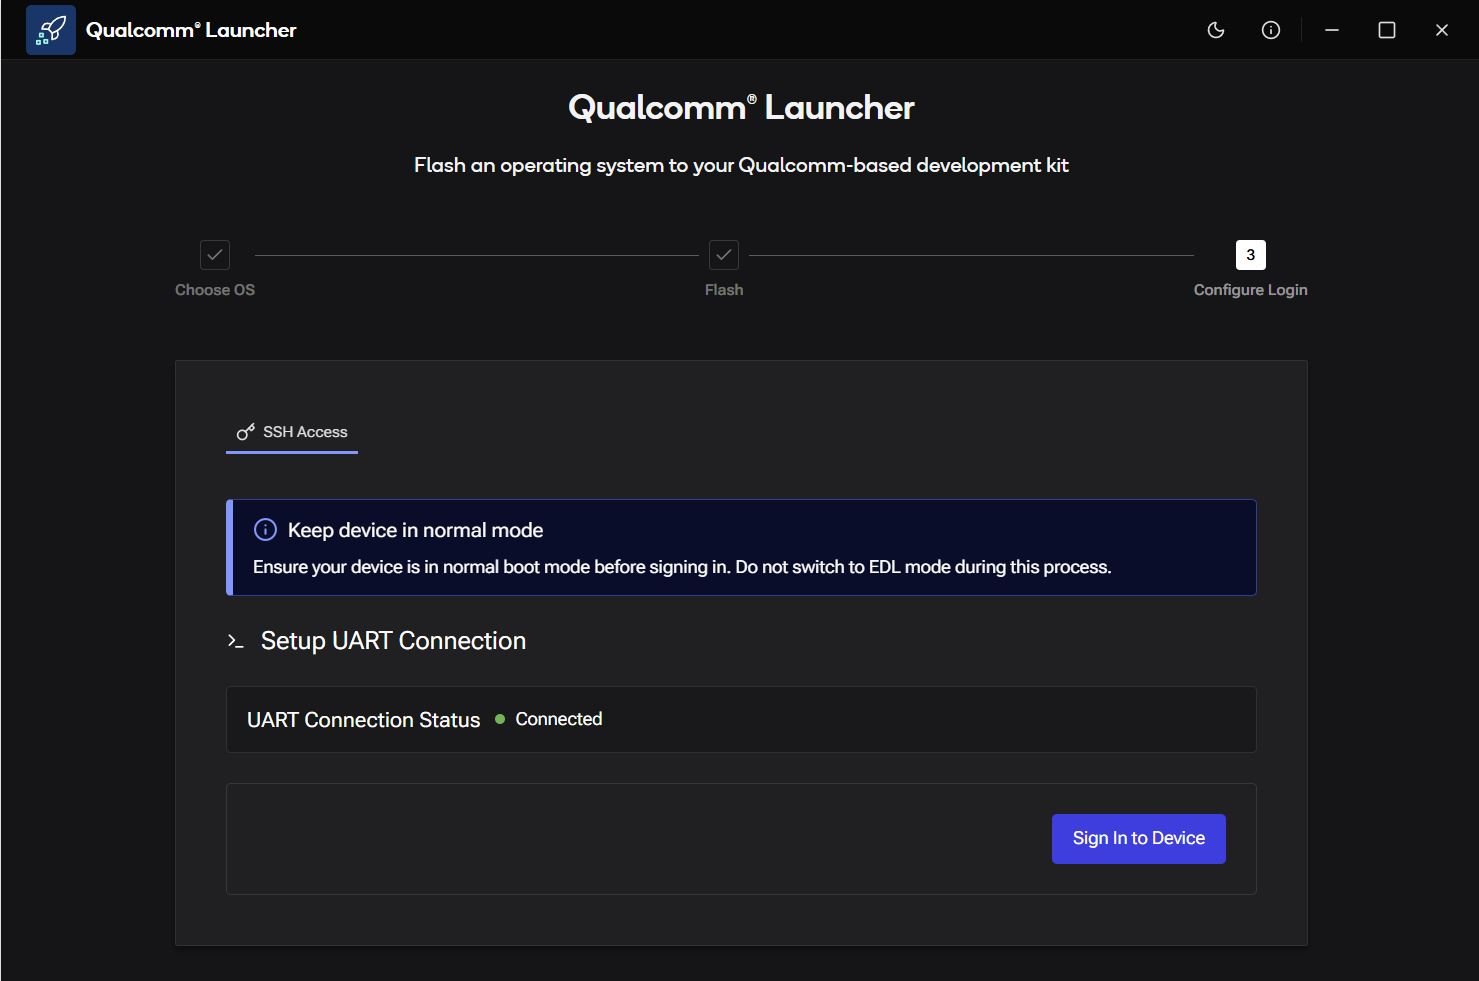
The Launcher can guide you through serial and network setup automatically. You can complete this step here, or skip it and follow the manual instructions in Set up the device. To continue with the Launcher:-
Turn off the SW2-3 DIP switch by pushing it down. With the switch down, the device boots normally into the OS instead of entering EDL mode.
- Connect the micro-USB cable from the micro-USB (debug) port on the EVK to your host computer.
- Power-cycle the device (turn off, then on using the power switch).
- Click Configure Login.
- The Qualcomm Launcher no longer shows the device as detected in EDL.
- The serial terminal in the Launcher begins displaying the boot log.
Step 7: Set up Wi-Fi
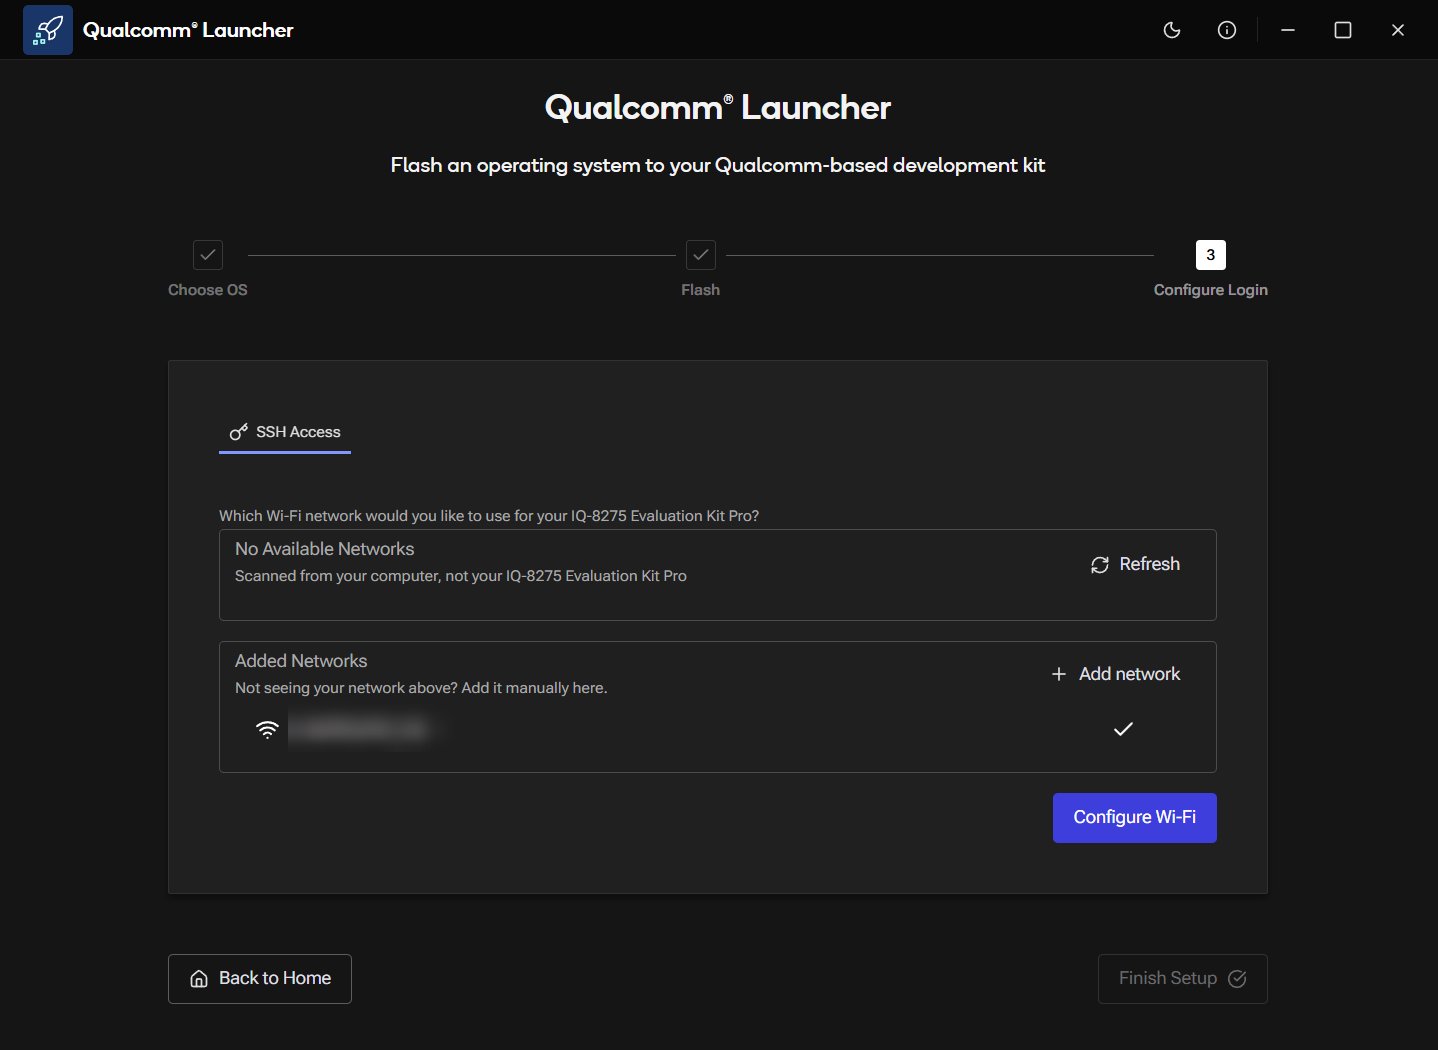
The SSH Access screen shows the available Wi-Fi networks.- Select a network from the list, or click + Add network to enter credentials manually.
- Click Configure Wi-Fi.
Step 8: Setup complete
Once Wi-Fi is configured, the Launcher displays the Configuration Summary with the device IP address and the SSH command ready to copy. The device reboots once to apply the post-flash configuration.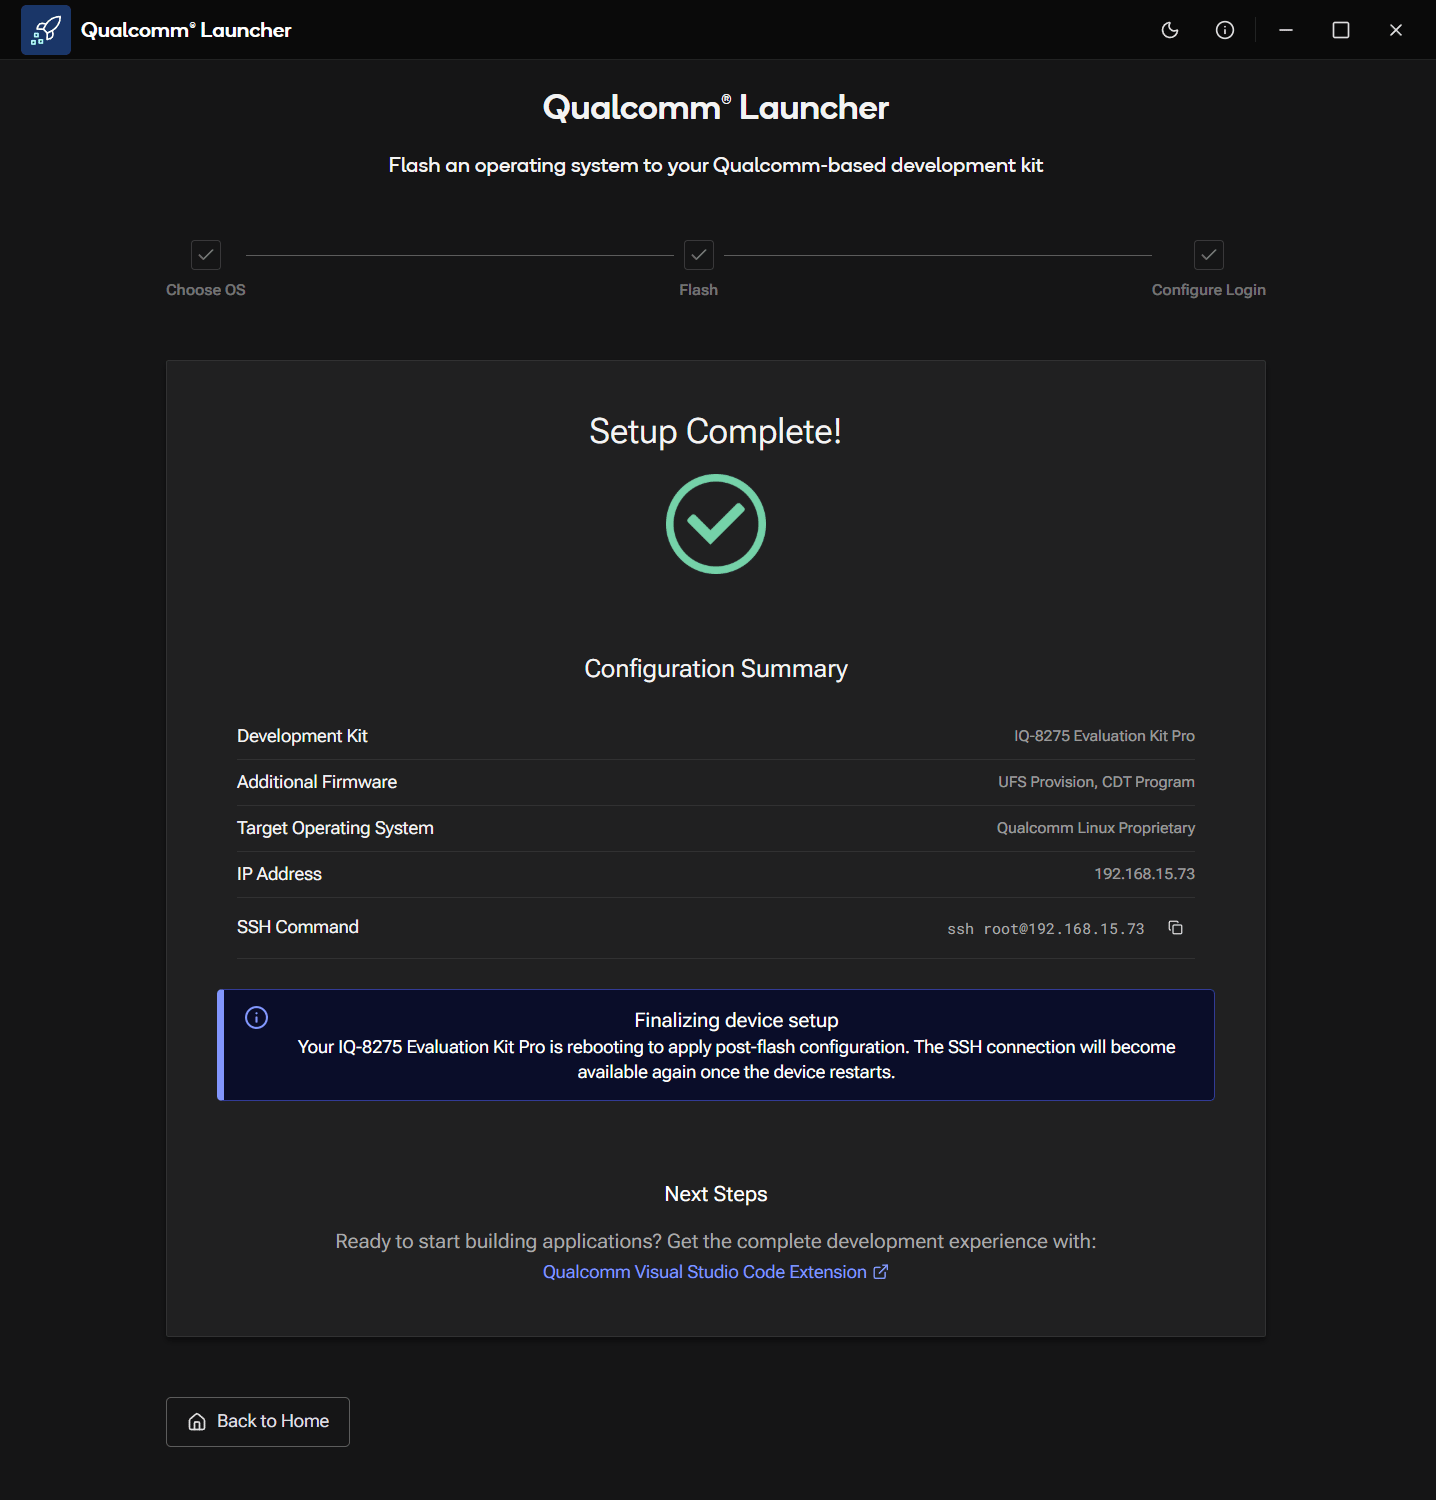
root / oelinux123):
If Qualcomm Launcher does not work on your host or does not detect the device, use Flash Qualcomm Linux using QDL as an alternative.
Next steps
- Set up the device. If you skipped the UART/Wi-Fi setup above, follow the manual instructions there.