

Key Features
- OpenAI-Compatible API: Drop-in replacement for OpenAI Chat Completions API
- Models run entirely on the NPU for fast performance, freeing up the CPU/GPU for other tasks.
- Multi-Model Support: supports LLMs such as qwen3-4b-instruct and llama3.1-8b as well as VLMs such as qwen3-4b-VL. Additional LLM/VLMs can be added easily from AI Hub.
- Automatic Context Management: Smart summarization when conversations get long
- Thread-Based Sessions: Maintains conversation context across requests, allowing you to switch between calls to LLM and VLM within the same container instance.
Setup
The steps below assume you have already set up your device (IQ-9075 EVK or IQ-8275 EVK). Once your device is set up, follow these steps to install and run the LLM/VLM microservice container. In this example, we will be copying both a LLM and a VLM model to the device and use a single instance of our container to run both.1
Install required packages
2
Set up Docker
3
Download the LLM/VLM models
Let’s download the qwen3-4b-instruct model optimized for QCS9075 from Hugging Face to get started. You can find a list of available LLM and VLM models on Qualcomm’s AI Hub page - you can use the filters on the left to select the chipset and model type you are interested in.
Direct Download:
Direct Download:
4
Install the LLM/VLM Models
Now that you have downloaded the zip file, copy it to your device and unzip. For this example we will assume you have created a models directory at
Your models directory should now look like:
Your models directory should now look like:
~/models.IQ-9075 EVK
IQ-9075 EVK
~/models/qwen3_4b_instruct_2507-genie-w4a16-qualcomm_qcs9075/~/models/qwen2_5_vl_7b_instruct-genie-w4a16-qualcomm_qcs9075/IQ-8275 EVK
IQ-8275 EVK
~/models/qwen3_4b_instruct_2507-genie-w4a16-qualcomm_qcs8275/~/models/qwen2_5_vl_7b_instruct-genie-w4a16-qualcomm_qcs8275/5
Install the docker compose file onto your device
Download the Docker Compose file for your device from the CodeLinaro deploy directory.
IQ-9075 EVK
IQ-9075 EVK
IQ-8275 EVK
IQ-8275 EVK
The remaining steps use
docker-compose-qcs9100-ubuntu.yaml. If you are on the IQ-8275, substitute docker-compose-qcs8300-ubuntu.yaml in each command.6
Configure your LLM/VLM Container
Edit the Docker Compose file you copied to the device to configure:
Under
Under
environment:- GENAI_PORT: Change the port # where you want the service exposed (default: 9001)
- MAX_ACTIVE_MODELS: Maximum number of distinct models the service will keep loaded simultaneously. When a new model is requested and the limit has been reached, the least-recently-used model is unloaded to make room. Each loaded model holds DSP/NPU resources and memory. (default: 2)
- GENAI_CONTEXT_CAPPING: A safety cap on the context window each model is allowed to use. When set, every model’s native context size is reduced to min(original_size, cap). This limits memory usage and helps prevent out-of-memory situations on constrained devices. (default: 2048)
volumes:- GENAI_MODEL_DIR: Change to point to your models directory. In this example, we are using ~/models so change to:
${GENAI_MODEL_DIR:-~/models}:/mnt/work/models/
7
Start the container
The docker compose file will automatically download the container to your device if not present and run it with your configured settings.
8
Verify the LLM is working
Open a browser and navigate to
http://<Device IP address>:<port>/docs to open the API browser.
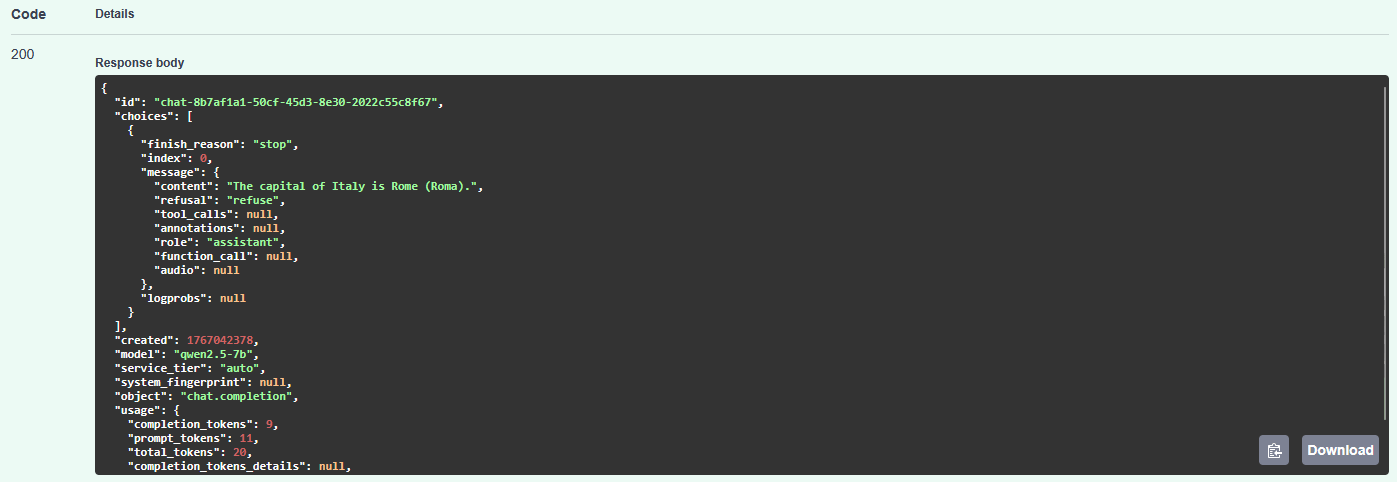
In the /v1/chat/completions/ API:- Select ‘Try it out’
- Replace the request body with:
- Click on ‘Execute’ to send the request. You should see the response on the page below.
9
Verify the VLM is working
Open a browser and navigate to
http://<Device IP address>:<port>/docs to open the API browser.
In the /v1/chat/completions/ API:- Select ‘Try it out’
- Replace the request body with:
- Click on ‘Execute’ to send the request. You should see the response on the page below. Note that the VLM may take a few seconds to run.
 When you call the VLM for the first time after previously calling the LLM (or vice versa), there will be a slight delay in the response as the container is unloading the previous LLM and loading the VLM. Subsequent calls will execute much faster.
10
Stopping the Container
When you are finished, you can stop the container using the following: