Launch the Qualcomm® Launcher application from your host machine.
2
Select your development kit
Click Select Development Kit and choose your kit from the available list.
Use the search box to filter by name.
Development kit selection dialog
3
Select the target operating system
After selecting your development kit, choose a Target Operating System.
Official release
Custom image
Use the Variant and Version dropdowns to select an official OS release.
Select Custom and point to a local folder containing your image.
You can also change the Download Location from the default path.
Target OS selection — Ubuntu selected, no device connected
If no compatible device is detected, the screen shows: “No compatible device detected. Connect your device via USB and ensure it is in EDL mode.” A Steps to Enter EDL Mode link is provided in-app.
Target OS selection — Flash button becomes active once a device is detected
4
Put the device in EDL mode
Place the device into EDL (Emergency Download) mode before flashing.
Step-by-step instructions for your specific device are available inside the application via the Steps to Enter EDL Mode link.Once in EDL mode, the device is detected automatically.
5
Click Flash
Click the Flash button to begin the flashing process.
6
Monitor flashing progress
The progress screen shows real-time flashing status: platform image download, background flashing activity, and a live log.
Flashing in progress — do not interrupt
This process may take several minutes. Do not close the application or disconnect the device while flashing is in progress.
If flashing fails repeatedly with qdl: unable to open USB device errors on Windows, a conflicting USB driver may be the cause. Refer to Resolve USB Driver Conflicts to resolve the issue.
7
Handle the EDL re-entry prompt (if shown)
Some firmware updates require a second EDL mode placement mid-flash. If this applies to your device, a prompt appears:
Put Device in EDL Mode to Continue
The additional firmware flash step completed successfully. To proceed with flashing the operating system, the device must be placed in EDL mode again.
EDL mode re-entry prompt — waiting for device
Re-enter EDL mode as prompted. Flashing resumes automatically once the device is detected.
8
Confirm flashing complete
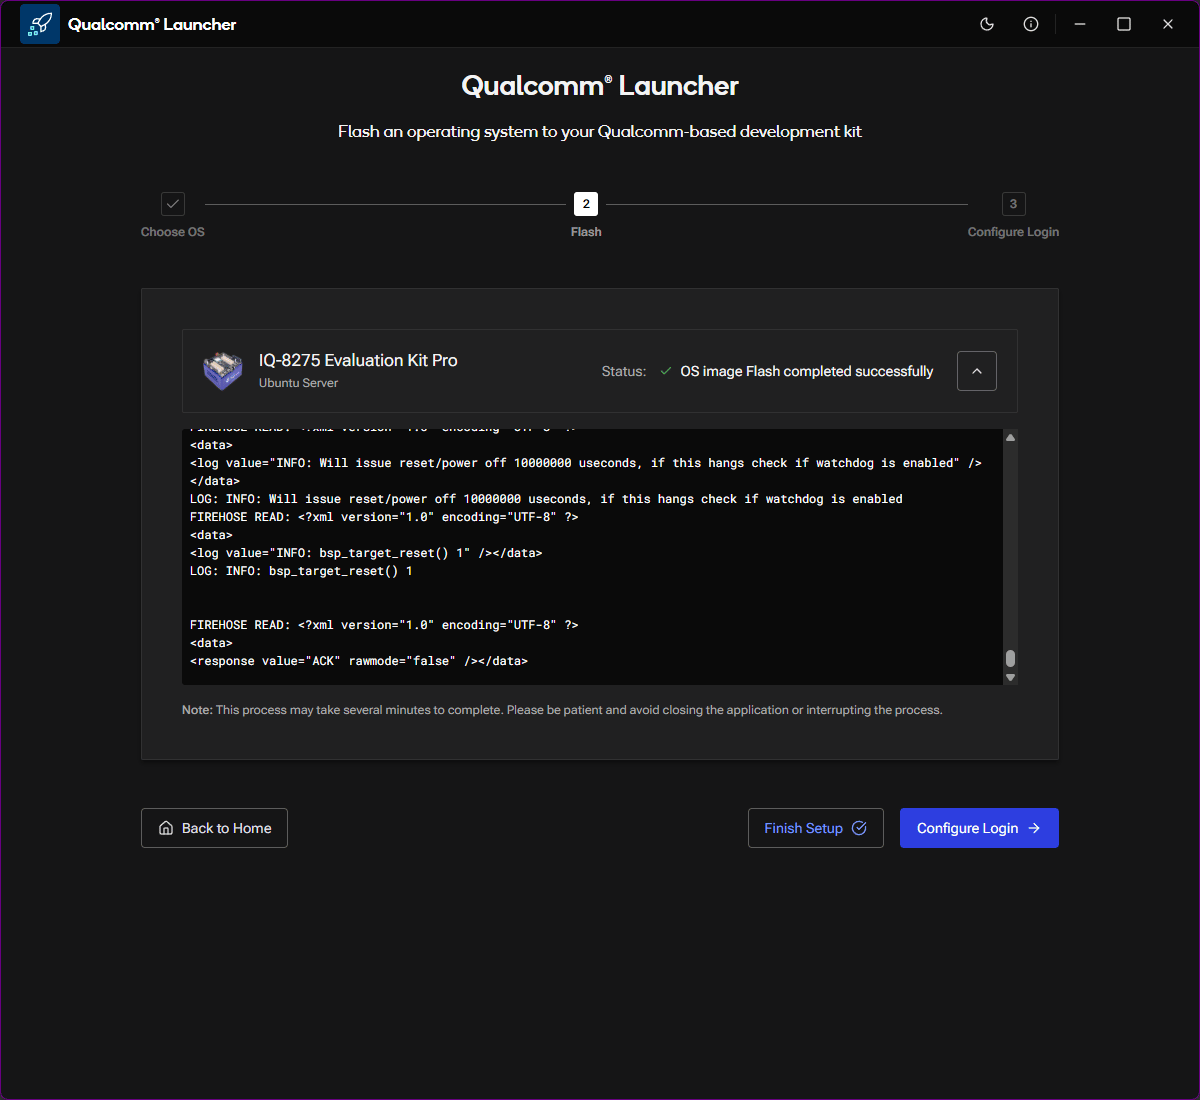
When the OS image flashes successfully, the status changes to “OS image Flash completed successfully” and the Configure Login button becomes active.
Flashing complete — ready for device configuration
OS flashing is complete. The device is ready for initial configuration.